Reverse Engineering or how can I generate API documentation?
Preface
I’ve been thinking on this topic for a long time. Some of the projects I’ve worked on had no API documentation at all. And I had to spend a lot of time to understand how the API works. I had to use the browser developer tools to see the requests and responses, and based on that, I was able to create postman collections and write automated tests. But it is not always convenient and takes a lot of time. Especially when the API is large and complex, and you have limited time to create tests.
Another case when you have already written a bunch of e2e tests, but you want to replace them with API tests. Or you simply want to speed up the preparation process of e2e tests by using API calls.
In this post, I will show you how to generate API documentation and postman collections by simply using reverse engineering.
I will try to cover both scenarios: when you run automated tests and when you run manual tests.
What is reverse engineering?
Reverse engineering is the process of extracting knowledge or design information from anything. We can analyze the structure, behavior, and elements of the system to understand how it works.
In fact, we already use reverse engineering in our daily work. For example, when we need to understand how the API works, we use the browser developer tools to see the requests and responses.
But we are lucky because we have tools that can help us to automate this process.
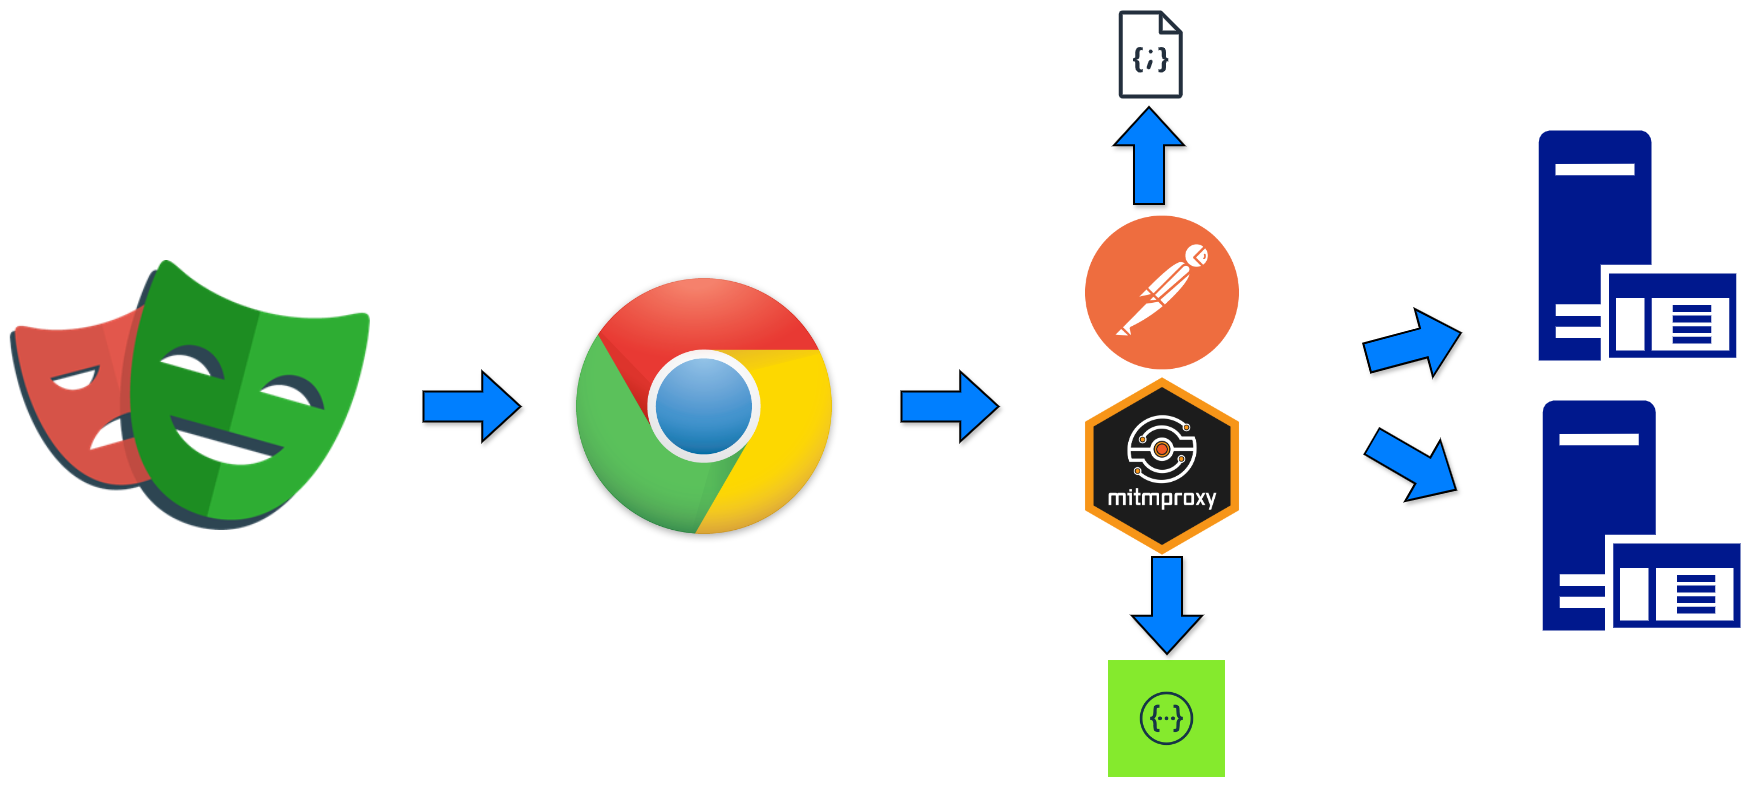
Proxy
We will use a proxy to intercept requests and responses between the client and the server. Generally, a proxy is a server that acts as an intermediary for requests from clients seeking resources from other servers.
How to generate a Postman collection?
Let’s imagine you have a web application that uses an API. In your Test Management System (TMS), you have a bunch of e2e tests, either manual or automated, that you want to replace with API tests.
In a simple scenario, it looks like this:
- Open the page in the browser
- Fill in the form
- Click the button
- Check the result
It is all about the UI. But there is an API call behind each action. Can we somehow gather all these API calls and create a Postman collection?
Easily!
I assume you have already installed Postman on your machine.
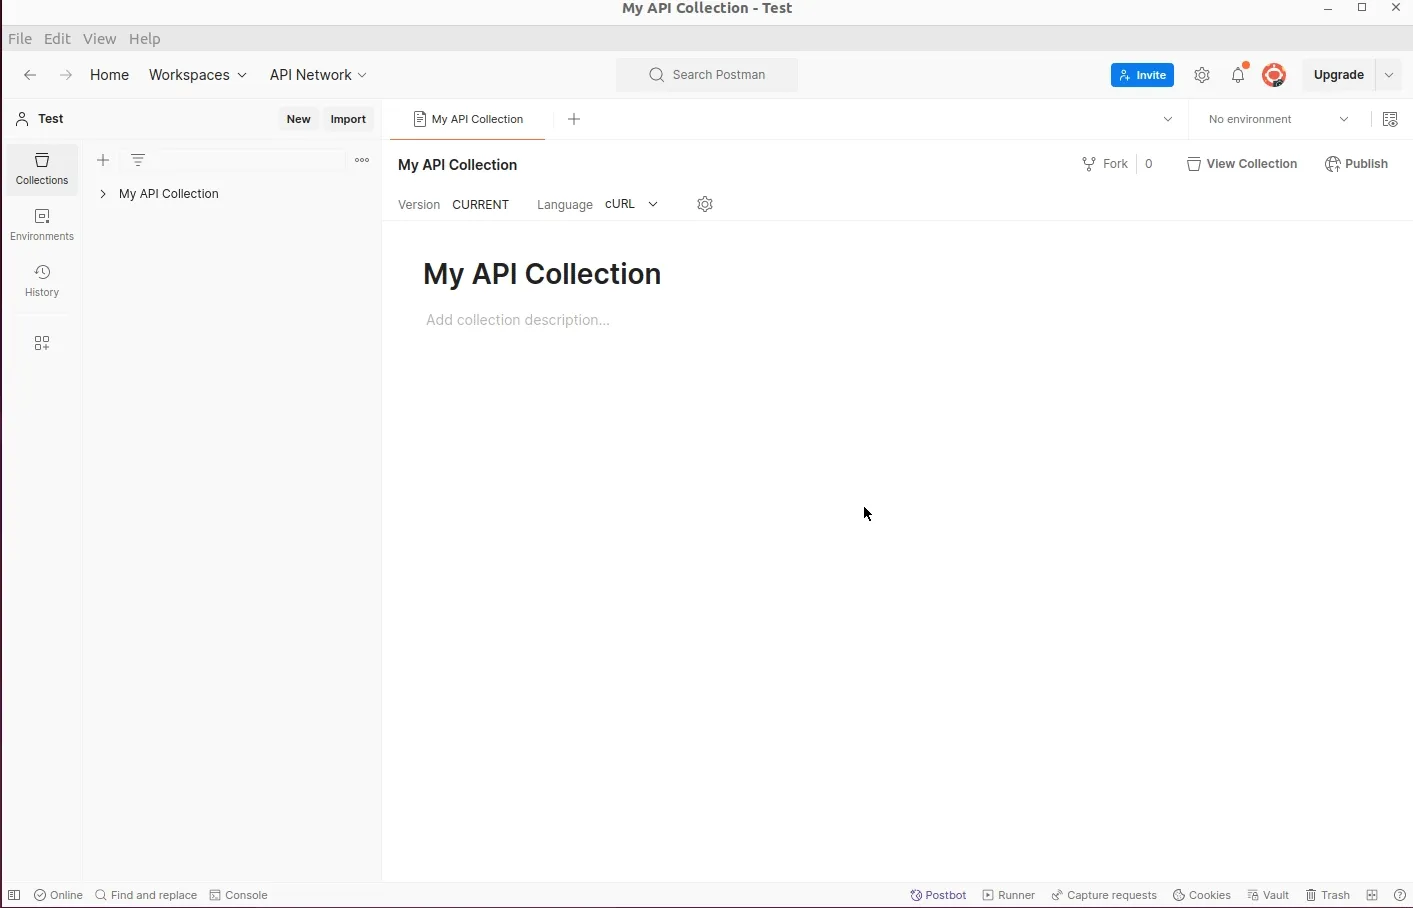
- Create a collection in Postman (I will call it
My API Collection) - Enable capturing requests in Postman
Here is a small gif that shows how to enable capturing requests in Postman.
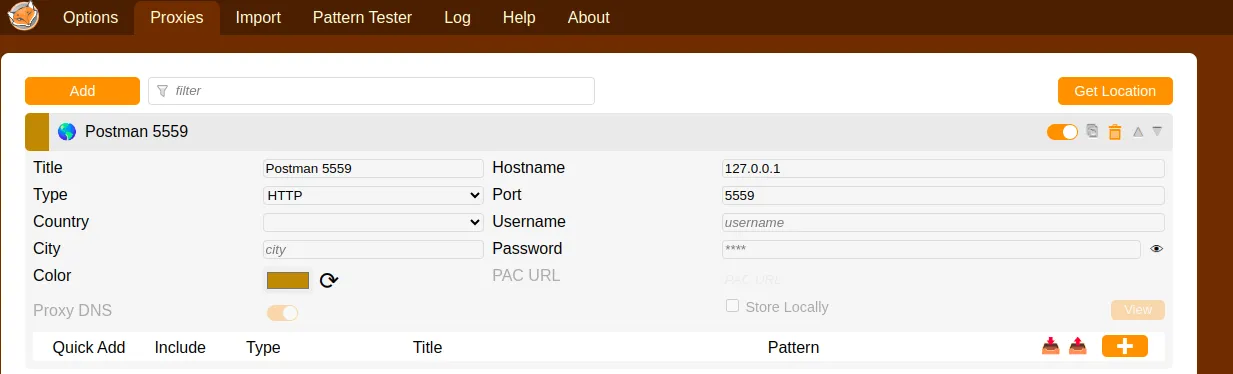
We enabled proxy (you need to remember the port you submitted) and configured parameters for requests capturing such as the url I want to capture requests to and methods I am interested in.
3.Install the Postman certificate. This step is for manual tests. If you run automated tests, you can skip it. You can find a manual on how to install the Postman certificate here Postman docs
4.Enable a browser to use proxy
Manual tests
Install a browser extension and set up proxy settings.
I recommend using the FoxyProxy extension for Firefox and Chrome. There is also a SwitchyOmega extension for Chrome. But as I will use FoxyProxy with Chrome.
Automated tests
Here we don’t need to set up any extensions. We just add a proxy to playwright config.
Like this:
  use: {
    ignoreHTTPSErrors: true,
    // Postman proxy
    proxy: { server: 'http://localhost:5559' }
    }
Important note: We need to add ignoreHTTPSErrors: true to the playwright config because Postman uses a self-signed certificate
and it will cause an error if we don’t ignore it.
- Run your tests
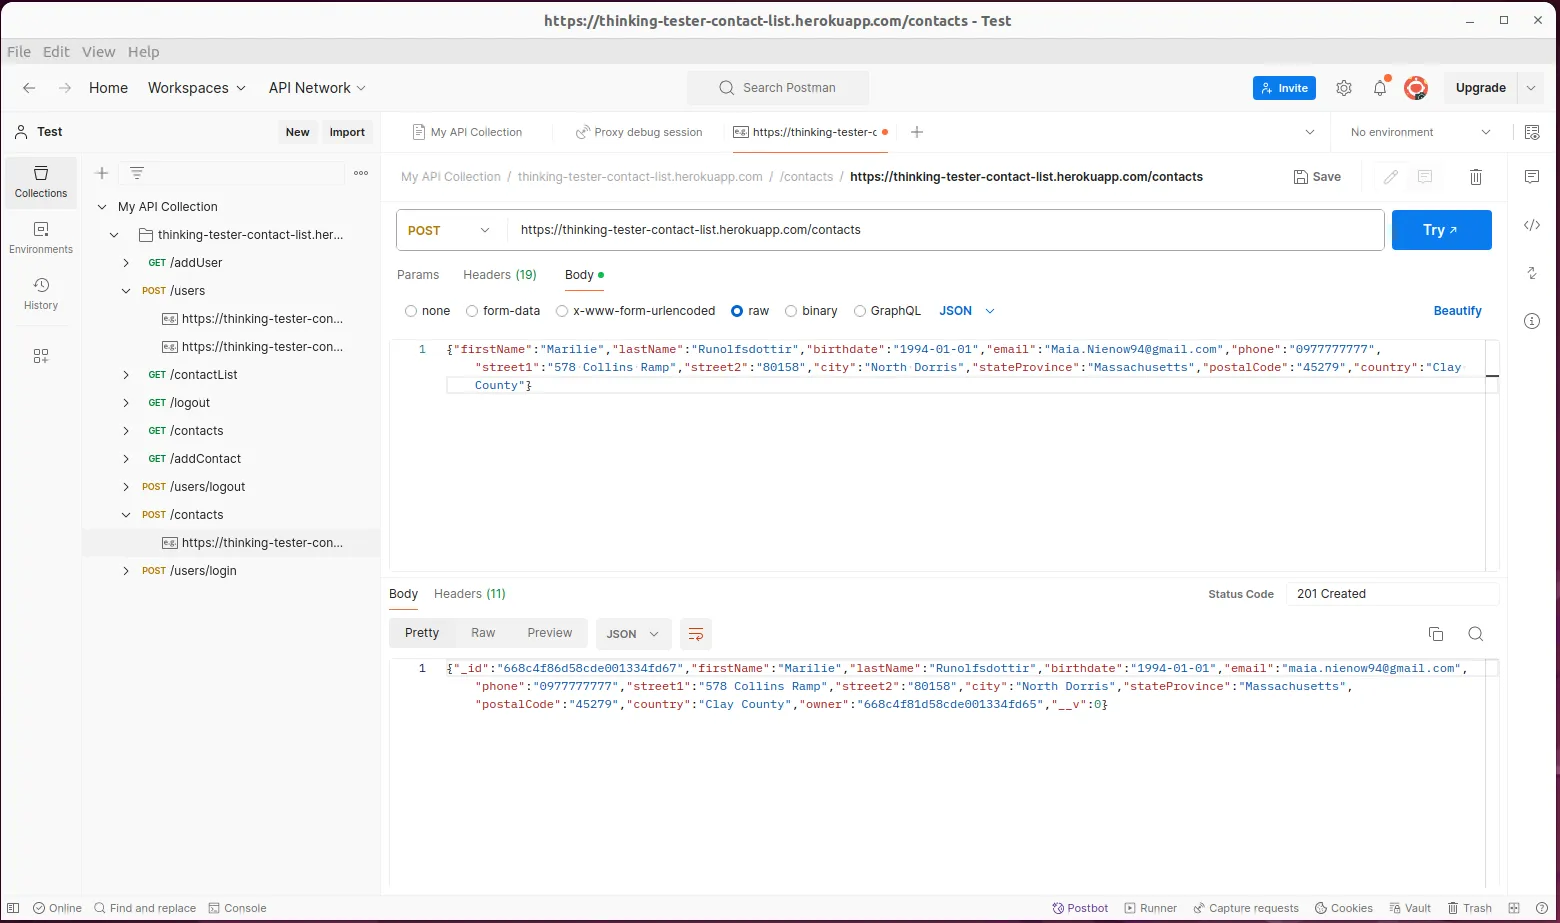
Either run automated tests or perform manual tests. Postman will capture all requests and responses.
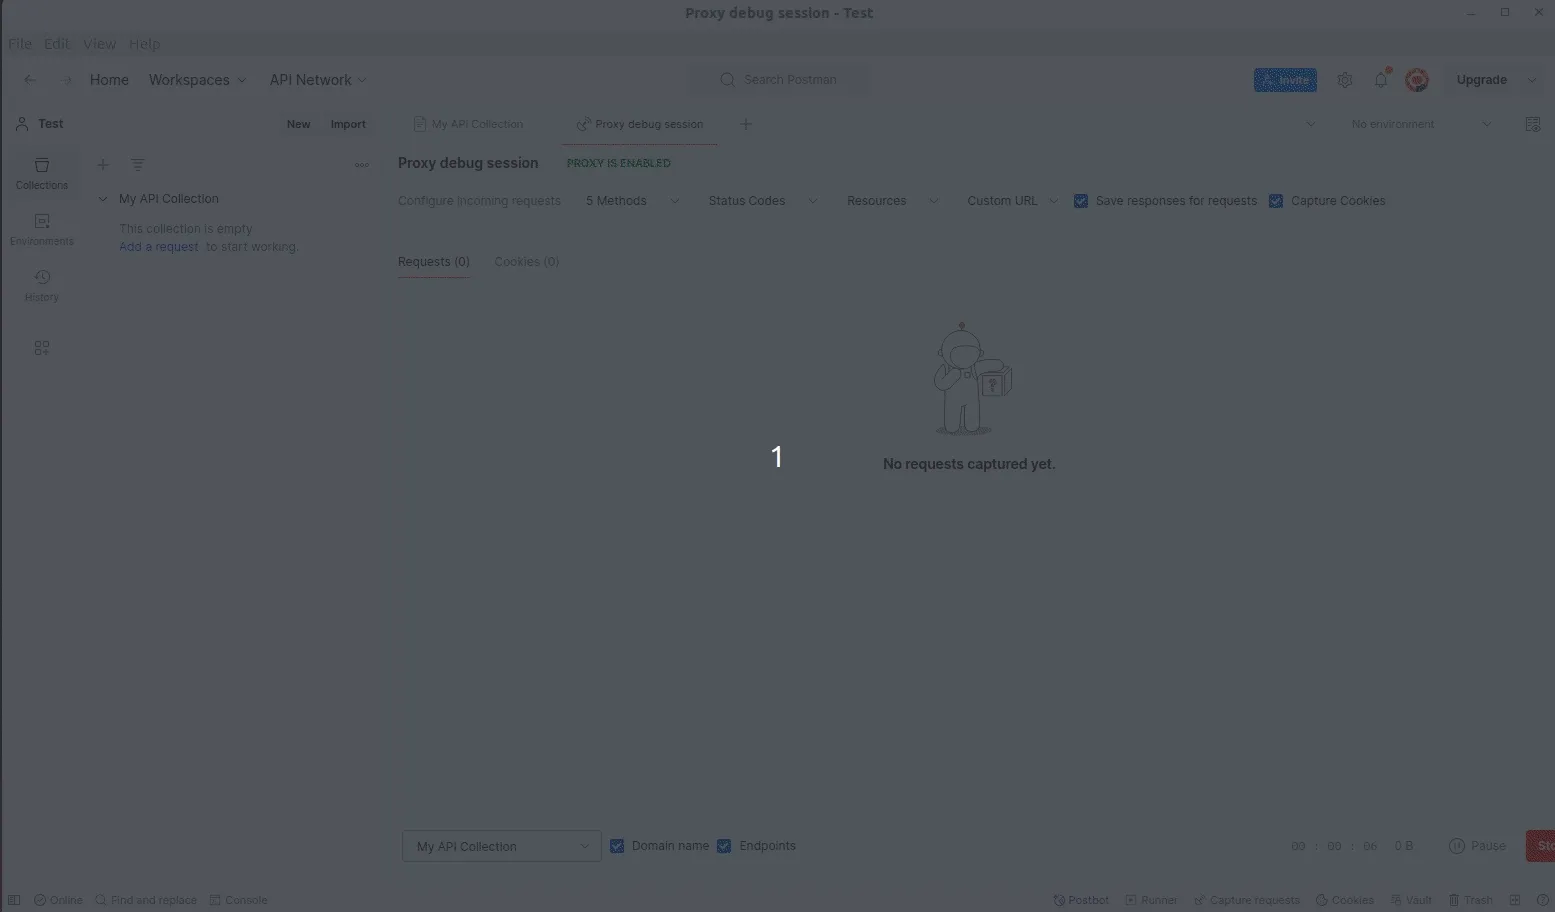
- Stop capturing requests in Postman and check the results.
For some reason Postman still captures requests for assets like images, css, etc. even though we set up the filter. So we need to remove them manually.
This is what I got as a final result:
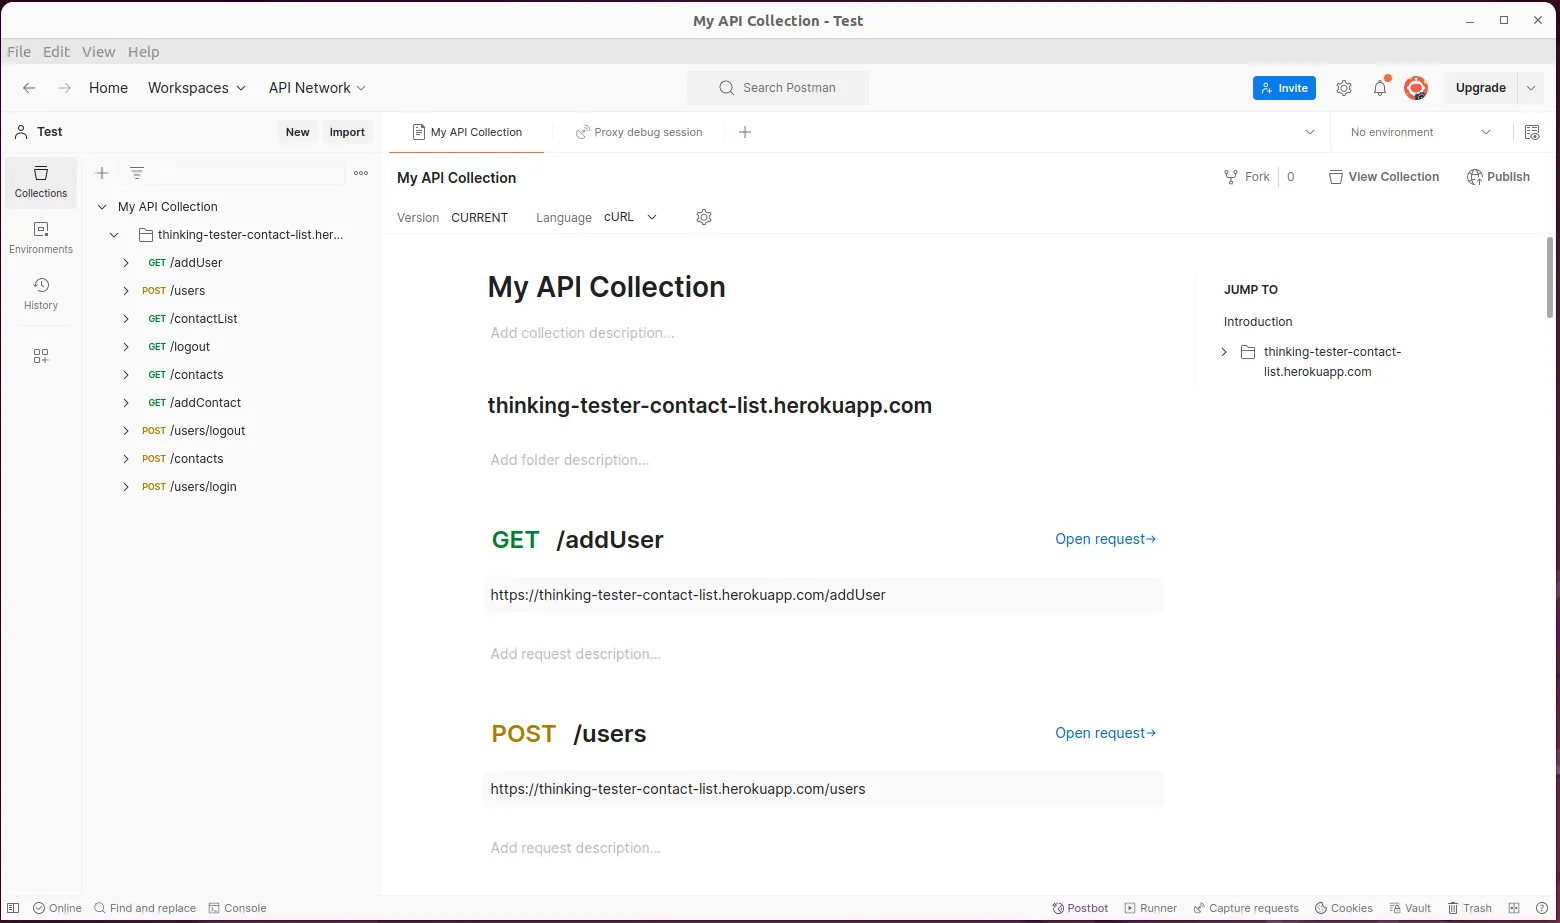
Each endpoint has a request and a response.
Congratulations! You have just created a Postman collection using built-in proxy in Postman.
Now you can do whatever you want with this collection: run it, export it, share it, etc.
How to generate API documentation?
Now let’s take a look at how to generate API documentation in its usual form.
It is the same approach as with a Postman collection, but we will use another tool.
mitmproxy2swagger
mitmproxy is a free and open-source interactive HTTPS proxy.
mitmproxy2swagger is a tool that generates Swagger/OpenAPI documentation from mitmproxy logs.
You will need to install them both. Installation instructions can be found by following the links above.
- Start mitmproxy with UI enabled
Run the following command:
mitmweb
It will start the mitmproxy and open the UI in your browser.
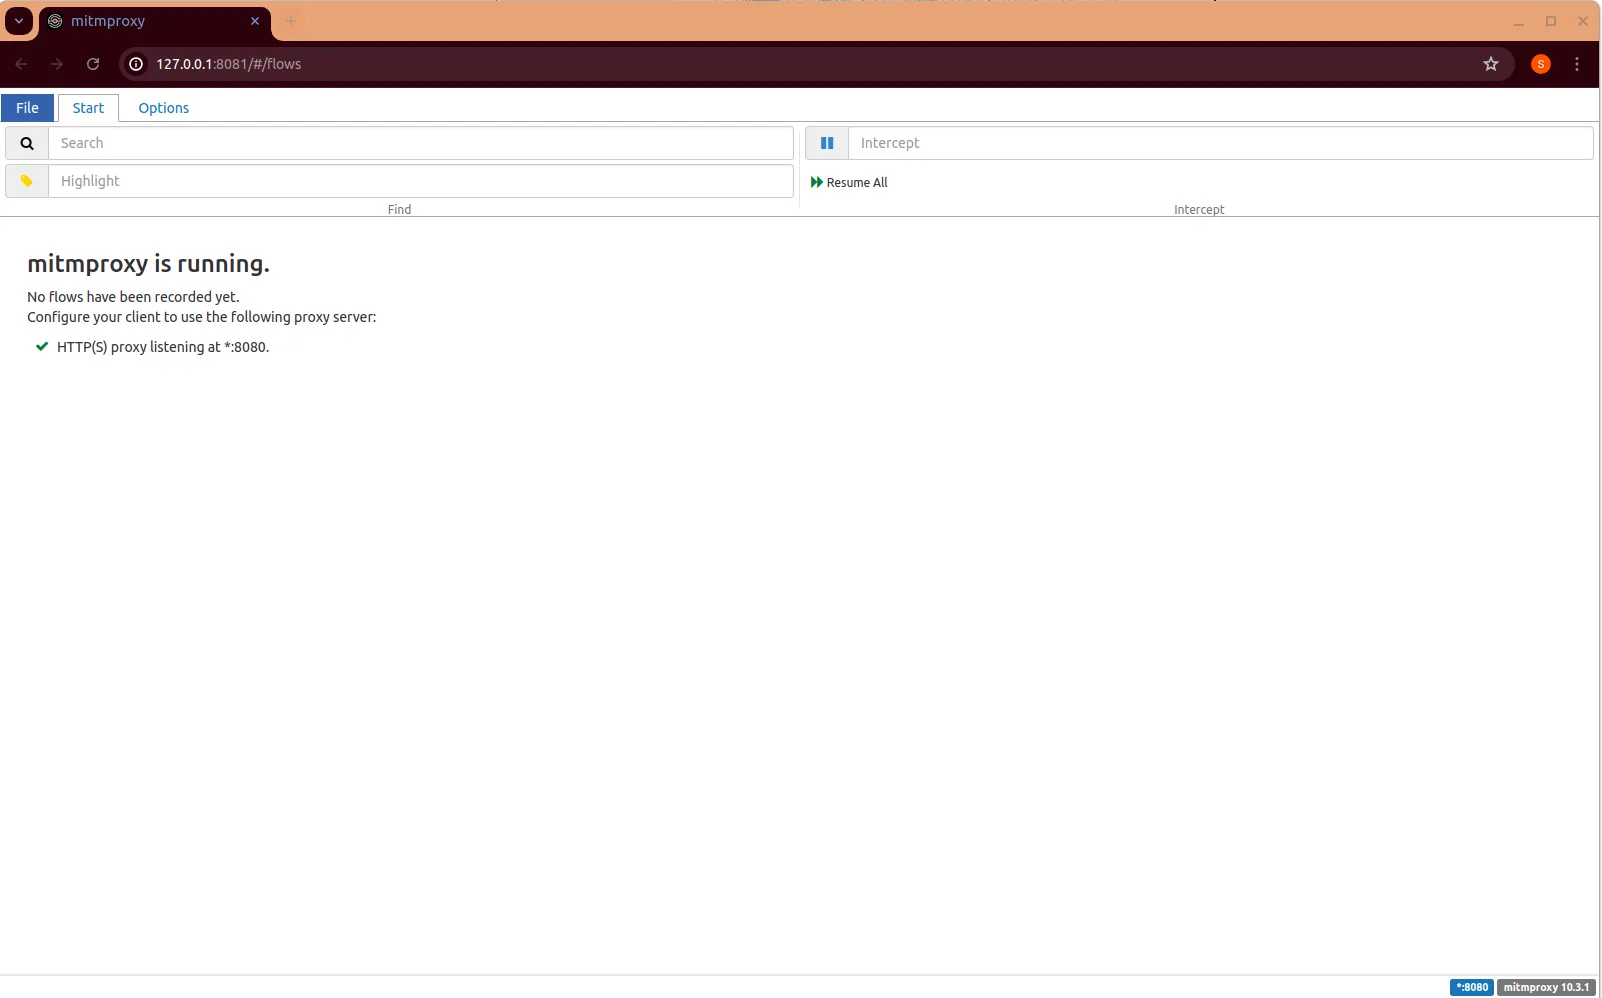
By default, mitmproxy listens on port 8080. And UI is available on port 8081.
- Enable a browser to use proxy
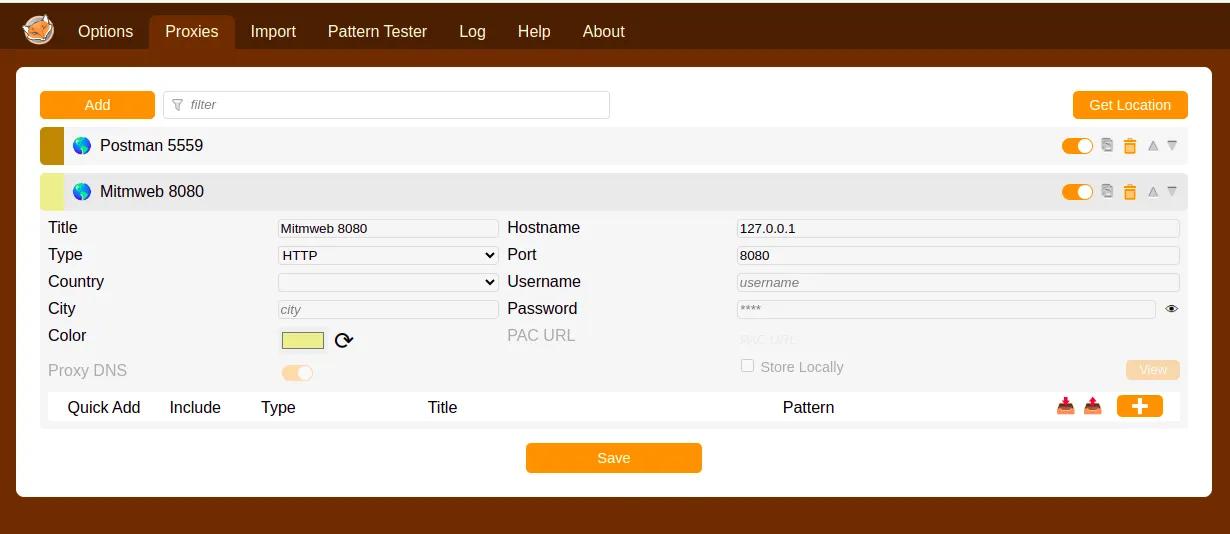
Manual tests
You need to create another profile in your browser extension for mitmproxy for running manual tests. Like this:
Automated tests
Add a proxy to playwright config.
  use: {
    ignoreHTTPSErrors: true,
    // mitmproxy
    proxy: { server: 'http://localhost:8080' }
    }
- Install mitmproxy certificate
Only for manual tests. If you run automated tests, you can skip this step.
You can find instructions on how to install the mitmproxy certificate here.
But I can tell that the easiest way is to open mitm.it in your browser while mitmproxy is running and follow the instructions for your platform.
- Run your tests
Either run automated tests or perform manual tests. mitmproxy will capture all requests and responses.
You can see them on the UI at http://localhost:8081.
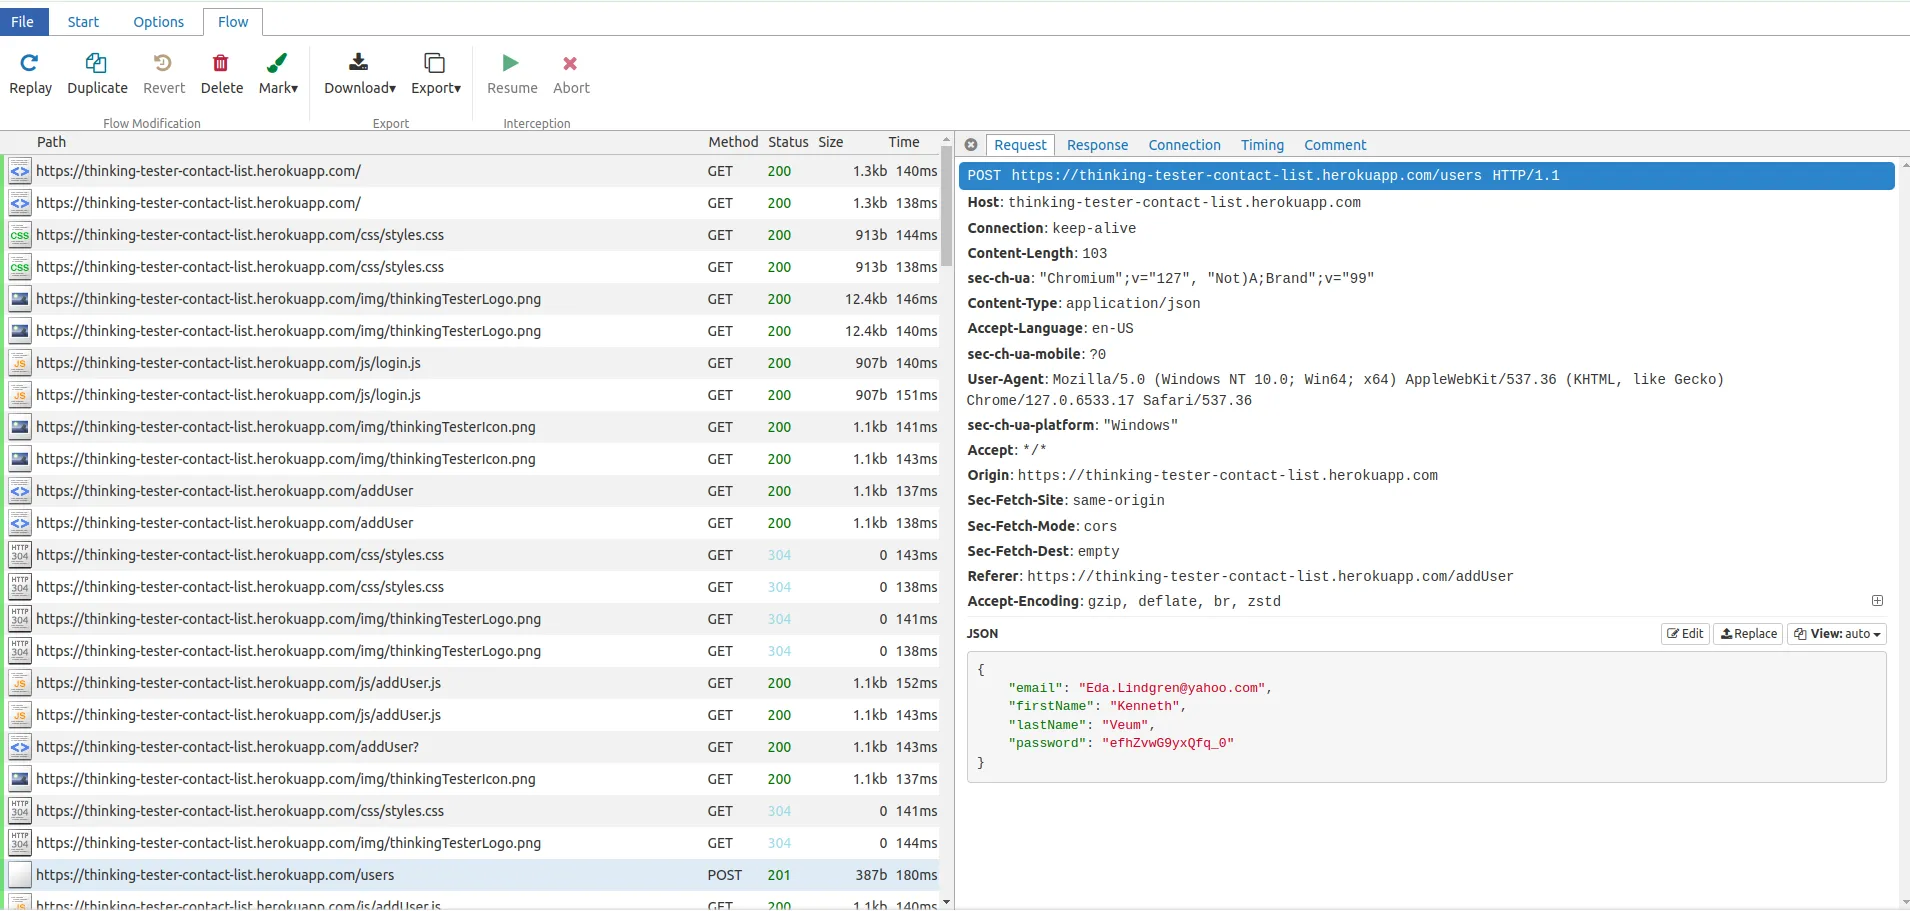
- Save the results
After you have captured all the requests you need, on the mitmproxy UI, click File -> Save. It should create a file flows.
- Generate Swagger/OpenAPI documentation
Run the following command:
mitmproxy2swagger -i <path_to_mitmptoxy_flow> -o <path_to_output_schema> -p <api_prefix>
in my case it looks like this:
mitmproxy2swagger -i flows -o test_api.yml -p https://thinking-tester-contact-list.herokuapp.com/ -f flow

After running this command, you will get a file test_api.yml with the OpenAPI schema.
Open it in any editor and remove unnecessary endpoints and ignore: prefix for each endpoint you want to keep.
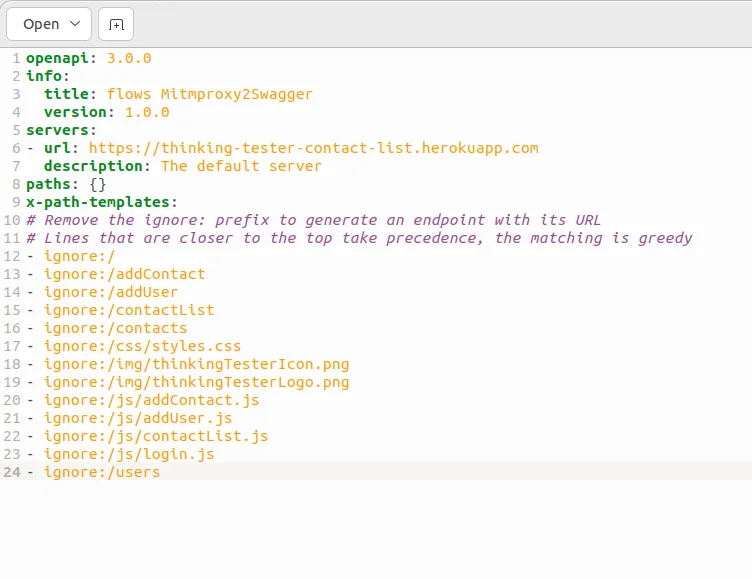
Now run the same command again and you will get a clean OpenAPI schema.
mitmproxy2swagger -i flows -o test_api.yml -p https://thinking-tester-contact-list.herokuapp.com/ -f flow
You can copy this schema to any Swagger editor like Swagger Editor and see the documentation in a more user-friendly way.
Conclusion
Even if developers don’t provide API documentation, you can generate it by using reverse engineering.
It is a very powerful approach that can save you a lot of time and effort.
Of course, this approach has some limitations. The main one is that you can’t get the full picture of the API. You can only see the requests and responses that you have captured.
Another limitation is that a documentation generated by reverse engineering can be outdated and not accurate.
But it is better than nothing. Hope this post will help you to speed up the process of creating API tests.
Thanks for reading!
Acknowledgments
I would like to thank Kristin Jackvony for allowing me to use her test application, Thinking Tester Contact List, in this post.
Also, I would like to thank to the team of APIsec University for the inspiration. I highly recommend their courses on API security. Even if you are not a security engineer, you will find a lot of useful information there.